Air-Fryer Rescue: Perfect Times & Temps for Leftovers
If you make any purchases through the links on this site, please know that as an Amazon Associate I earn from qualifying purchases. This costs you nothing extra.
Get free email updates with every new post or recipe! Sign up here.
Rescue Leftovers with an Air Fryer: Fast, Crispy, Safe
Want crispy leftovers in minutes? The air fryer uses hot circulating air to recreate oven-crisp textures with less time and oil than a conventional oven, and without the sogginess of a microwave. It’s why busy people and home chefs reach for it to revive pizza, fries, chicken, and more.
This guide gives practical times and temperatures for common leftovers, clear safety tips (internal temps and safe reheating practices), prep tricks to boost crispness, and quick fixes for soggy or dry results. Follow steps and you’ll make reheating predictable and delicious.


How an Air Fryer Heats Food: What to Expect
Rapid hot-air circulation
Air fryers are essentially compact convection ovens. A concentrated heating element sits above (or around) the food while a high-speed fan pushes very hot air across surfaces. That moving air strips away surface moisture quickly, encouraging browning and the Maillard reaction that creates crispness — which is why a cold slice of pizza can go from limp to crackly in minutes.
Concentrated heat + exposed surface
Because most air fryers use a shallow basket or perforated tray, more of the food’s surface is exposed to that hot air than in a covered pan. Less trapped steam means crisper crusts and edges with less added oil.
How it stacks up: microwave vs oven vs air fryer
Real-world: reheating four fries in a Cosori 5.8-Quart often takes 3–4 minutes; a full tray in a full-size countertop convection (like a Breville Smart Oven) can take 8–12 minutes.
Limitations & variables to watch
Several factors change outcomes, so times/temps in this guide are ranges you’ll tweak:
Quick, actionable tip: preheat briefly, arrange a single layer, and shake or flip halfway to promote even browning — small adjustments often fix big differences.
Food Safety & Temperature Fundamentals
Cool fast, store smart
Leftovers are only safe if they leave the “danger zone” quickly. Refrigerate within 2 hours of cooking (1 hour if room temp is above 90°F). If you’re cooling a large pot, divide it into shallow containers so it drops temperature faster. The FDA cooling guidance used by many pros: cool from 135°F to 70°F within 2 hours, then to 41°F within 4 more hours.
How long to keep it
Reheating vs. hot-holding
Hot-holding (buffets, warming trays) means keeping food at or above 135°F to prevent bacterial growth. Reheating is actively bringing food back up to a safe internal temperature — crispy exterior is great, but surface color doesn’t equal safety. A crunchy crust can hide a dangerously cool core.
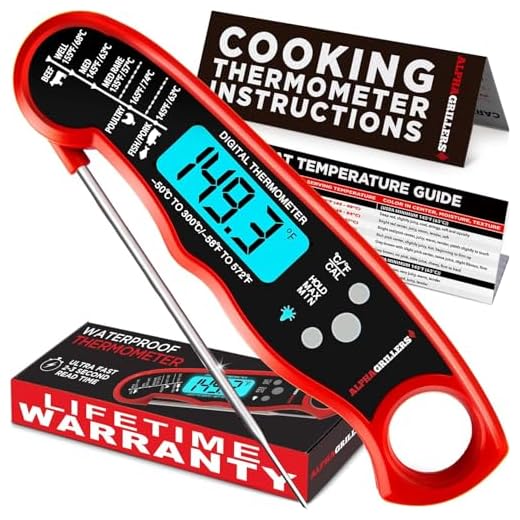
Target internal temperatures (use an instant-read thermometer)
Check temperature in the thickest part, avoiding bone or fat pockets. Small, accurate units like the Alpha Grillers Instant Read Digital Meat Thermometer make this fast and reliable.
Frozen-to-finished: special notes
Thaw in the refrigerator when possible. If reheating from frozen in an air fryer, increase time and verify temperature in the center. Discard leftovers that have sat in the danger zone over 2 hours, smell off, or show mold — when in doubt, throw it out.
Next, we’ll walk through quick prep steps and practical air-fryer techniques to get those safe, crispy results every time.
Prep & Practical Techniques Before Reheating
Trim, remove excess sauce, and pat dry
Sauces and puddles steam, preventing crisping. Spoon off excess gravy or loose marinara before reheating; for soggy wings or fries, pat with paper towels to remove surface moisture. Quick real-world test: patting fries made the difference between limp and restaurant-crisp in under 6 minutes.
Slice uniformly and single-layer spacing
Cut large pieces into even slices so the center heats at the same rate as the edge. Arrange items in a single layer with small gaps — overcrowding is the number-one reason for uneven reheats. If you own a 3–5 quart fryer (Cosori 5.8‑qt, Ninja AF101), one layer fits best; for larger baskets (Philips XXL) you can do a light second layer but rotate items.
Oil spritzing: types and how much
A light coating revives crusts. Use high-smoke-point oils: avocado, grapeseed, or refined olive oil. Use a sprayer or mister for even coverage; 1–2 quick spritzes (roughly 1/4–1/2 teaspoon per 4–6″ area) is usually enough — avoid drowning food.
Foil, parchment, and oven‑safe dishes
Loosely covering cheese-heavy or delicate items
For stuffed sandwiches or cheesy casseroles, tent foil lightly for the first half of the cycle, then remove to brown the top. Lower temperatures (about 25°F less than you’d use for bare crisps) reduce scorch risk.
When to flip or shake
Flip or rotate once midway for most solid items; shake baskets every 3–4 minutes for fries or small pieces. For thick pieces, check and flip at the 2/3 mark to reveal any cold spots.
Reheating mixed plates
Group like-with-like: crisp items together, saucy/soft items in dishes. If you must combine, heat high-and-fast for crisps first, then nestle softer items in for a short low-temp finish — staggered timing prevents soggy results.
Next: exact times and temperatures by food type.
Times & Temperatures by Food Type: Quick Reference Guide
Below are practical starting temps and time windows for common leftovers. Times assume a single layer, a preheated air fryer (typical 350–400°F for most crisps), and 3–5 qt baskets (Cosori 5.8‑qt, Ninja AF101) unless noted. Use the food-safety temps from Section 2 to verify doneness.
Fried chicken / wing-style foods
Breaded items & fries
Pizza & flatbreads

Roasted or grilled vegetables
Cooked rice & grains
Pasta bakes & lasagna
Steaks & pork chops
Ground-meat items (meatloaf, burgers)
Seafood (salmon, shrimp)
Sandwiches & wraps
Baked goods (croissants, muffins)
Casseroles
Scaling tips: frozen items need ~1.5× the refrigerated time; add 25–50°F for frozen crusted foods only. Always check centers; use the Section 2 safe internal temperatures to confirm. Up next: smart fixes when reheats go wrong—soggy, dry, or uneven results.
Troubleshooting & Fixes: Soggy, Dry, or Uneven Reheats
Soggy reheats
Soggy leftovers are the most common air-fryer headache—often from trapped steam. Quick fixes:
Dried-out proteins
Lean cuts and seafood can go chalky fast. Try this:
Uneven heating
Crowding and mixed sizes cause cold spots. Remedy it by:

Burnt or over-browned tops & saucy dishes
When tops darken before centers heat:
Reviving breaded items and undercooked crusts
Breaded chicken or pizza that’s gone limp can often be saved:
Salvaging overcooked leftovers
If something’s dry or tough, shift formats:
Quick checks & tools
Routinely verify internal temps with an instant-read thermometer, and do a visual/smell check before serving—cold centers, odd odors, or a dull color are red flags. Next up: organizing storage and reheats into a smooth meal-planning workflow.
Meal-Planning & Workflow: Store, Reheat, and Serve Efficiently
Cooling, portioning, and labeling for predictable reheats
Cool leftovers quickly (within 2 hours): spread in a shallow pan, then transfer to single‑serve containers to chill. Label with the date and a short reheating note (temp/time or “air-fry 375°F — 6–8 min”). Single-serve portions mean predictable timing and less drying from repeated reheats.

Reheating one vs reheating for a crowd
For one: reheat at a slightly higher temp for a shorter time (375–400°F for crisp items), checking sooner. For a crowd: batch and stagger — start the longest items first, hold finished items at 200°F in a low oven or warming drawer, and finish delicate items last. Two helpful setups: an air fryer plus oven, or two air-fryer drawers (e.g., Ninja Foodi dual-drawer models) to run parallel batches.
Mixed plates & multi-portion strategy
Arrange by cook-time: dense proteins and thick casseroles first, fries and breaded items last. Use racks if your model supports them (Philips XXL, Cosori Max XL); put longer‑time items on lower racks, quicker items above. Rotate trays and flip halfway for even results.
Combining appliances for best texture
Save saucy or stewed items for a stovetop finish: reheat gently in a covered pan to warm through, then transfer to the air fryer for a quick 1–2 minute crisp if desired. For sheet‑pan volumes or big trays, use the oven to reheat evenly and the air fryer to finish a crisp top.
From frozen vs fridge: safety vs texture
Thaw in the fridge when possible for best texture. From frozen, use a lower temp for longer or raise temp slightly and check often — always verify an internal temp of 165°F. For busy nights, frozen single-serve packets let you predict timing more reliably.
Now that your workflow is dialed in, you’re ready to reheat confidently with minimal stress — onward to final tips and takeaways.
Reheat Confidently: Crisp Results Every Time
Air fryers give faster, crisper reheats when you follow simple prep, safety, and timing rules. Start with recommended time/temperature ranges, use a probe thermometer to confirm safe internal temps, and apply small adjustments for your model and taste. Crisp textures benefit from light oil spritzing and brief preheats; steam-prone items improve with spacing and short flip cycles.
Treat ranges as starting points—test with small batches, note your settings, and iterate. With these habits you’ll rescue leftovers into reliably tasty meals. Try one reheated dish tonight and refine from there. Share tips with friends today.
Wanted to add: instant-read thermometers like Vuwwey or Alpha Grillers are cheap insurance. I used to guess by feel and ruined a roast. Now it’s exact — less anxiety when reheating for guests.
Absolutely — thermometers remove the guesswork and are especially helpful for dense or mixed dishes.
If anyone wants model suggestions, we mentioned Vuwwey and Alpha — both good choices.
Agree! Bought one after reading this article and can’t believe I waited so long.
Same here — even recommended it to my parents.
I tried the olive oil sprayer mentioned (YARRAMATE). Game changer for spraying a fine mist on leftovers — no pools of oil and everything crisps evenly. FYI: don’t overdo it or things taste too oily.
Great feedback on the sprayer. Fine mist helps a lot more than brushing or pouring. A few quick pumps is usually enough.
Good tip Connor — avocado oil also handles heat well.
I filled mine with avocado oil once — worked fine for higher temps.
Constructive: article is great but could use a short cheat-sheet infographic for beginners — like ‘Food Type | Temp | Time | Tip’ on one printable page. Would be perfect on the fridge.
Great idea — a fridge-friendly printable would be useful. We’ll pass that suggestion along for a future update.
Also, include a quick note about using the meal prep containers for faster cooling.
Noted — container size and cooling tips would fit well on that sheet.
Yes please! I’d hang that on my fridge and be done with guessing.
Got a weird uneven reheat — one side of my mac and cheese was scorching while other side cold. Article said to rearrange and maybe lower temp. I also think my air fryer basket (Large Stainless Steel Oven Air Fryer Basket) had a warped spot. Anyone else?
Yep, mine had a hot spot. I put a small silicone mat under one side once and it helped, but probably time to replace if warped.
Good call, I’ll check for warps. Thanks!
Uneven heat can come from overcrowding, warped baskets, or hot spots in the fryer. Try rotating and using a rack to elevate — the stainless basket you mentioned is usually solid, but double-check placement.
Anyone tried the 600 Air Fryer Recipes Cookbook for All? Bought it yesterday because the article mentioned it — recipes seem decent but some times are off for my model. Still recommend for variety though.
Same here. Good recipes but I usually reduce time by 10–20% because my fryer runs hot.
If you want, tell us which recipe and fryer model — we can suggest adjusted times.
Good tip Mark, I’ll try shorter times next batch.
Thanks for the note, Hannah. Cookbooks often give starting points — tweak times for your specific air fryer model and use a thermometer if unsure.
Great troubleshooting section. Fixed soggy fries by preheating the fryer and using the oven basket accessory so crumbs fell away. Pro tip: shake halfway and give 2-3 min extra if needed.
400°F works for me for fries; for delicate stuff I drop to 350°F.
How hot do you preheat to? I usually do 400°F but not sure if it’s overkill.
Exactly — preheating and using the right basket make a big difference. Thanks for sharing your trick!
I had a soggy chicken wing crisis but the troubleshooting section saved me. Did a quick blast at 400°F for 3-4 mins at the end and boom — crispy again. Also picked up the Large Stainless Steel Oven Air Fryer Basket for better airflow, worth the buy.
Nice rescue! That finishing blast is underrated for re-crisping. Glad the basket helped.
Yep uncovered for the last few minutes. No splatter issues with pre-cooked wings — if sauced heavily maybe do it less time.
Question: do you leave the wings uncovered for that 400°F blast? I worry about splatter.
Question — the guide says 350°F for casseroles, but mine always comes out dry. Do I lower temp or add moisture? I followed the ‘Prep & Practical Techniques’ section but still meh.
Try adding a splash of broth or a few drops of water on top, then cover loosely with foil for the first half of reheating, remove to crisp at the end. Also check the thermometer (Vuwwey or Alpha) — sometimes internal temp overshoots quickly.
Lower temp to 325°F and add a little broth like admin said. Casseroles reheat weirdly because of density — stirring halfway helps if it’s not a layered bake.
I love the meal-planning section — using 50-Pack 28oz Reusable Meal Prep Containers made batch reheating so organized. I label the containers with date and suggested reheat temp right on the lid. Saves so much guesswork.
I use a permanent marker on the lid but you could use masking tape if you prefer removable labels.
Great idea — I usually forget which container is which. Do you write directly on the lids or use stickers?
That’s a smart workflow, Priya. Labeling with temp and time is one of the easiest ways to avoid over/under reheating.
Minor nit: article suggested a general temp for chicken pieces, but didn’t differentiate between dark vs white meat. Dark meat needs a bit longer IMO.
Thanks — I’ll aim for 165°F and then rest a couple minutes to redistribute juices.
Good observation — dark meat (thighs/legs) has more connective tissue and can handle slightly longer reheating. Aim for the safe internal temp and keep an eye on dryness.
I appreciate the food safety fundamentals section. Quick question: when using the Vuwwey dual-probe thermometer, should both probes go into the same piece of food or different pieces to test evenness?
Best practice: put probes in two representative spots — one in the center of the thickest piece and another in a different area (or a second piece) to check evenness across the batch.
Cool thanks. Makes sense.
Is the YuxingK accessory kit worth it or just a gimmick? I only reheat leftovers, not trying to bake or fry new recipes.
I bought the kit for $20 and use the racks all the time for reheating wings and small containers. Totally changed how many things fit in my fryer.
Good to know — might grab the racks then.
The kit can be handy if you like baskets, racks, or silicone liners — but if you’re only reheating flat things and using a basket already, it might not be necessary.
Loved the quick-reference table — finally a one-stop place for reheating fries without turning them into chips. Tried the times for leftover pizza and got perfect crisp edges. Used the Alpha Grillers instant read thermometer to check the center and it was spot on.
I actually brush a tiny bit of olive oil (YARRAMATE sprayer) on the crust before tossing into the air fryer — crisps it up without drying.
So glad it worked for you, Maya! The Alpha Grillers is a lifesaver for checking internal temps quickly. Any tips you discovered while reheating pizza?